Corner pin, mesh warp, and finally a Settings window
Export is basically there on Linux. Today I went back to things I actually want to do in the editor.
Corner pin and mesh warp
Any clip can now be bent. Video, photos, text, captions.
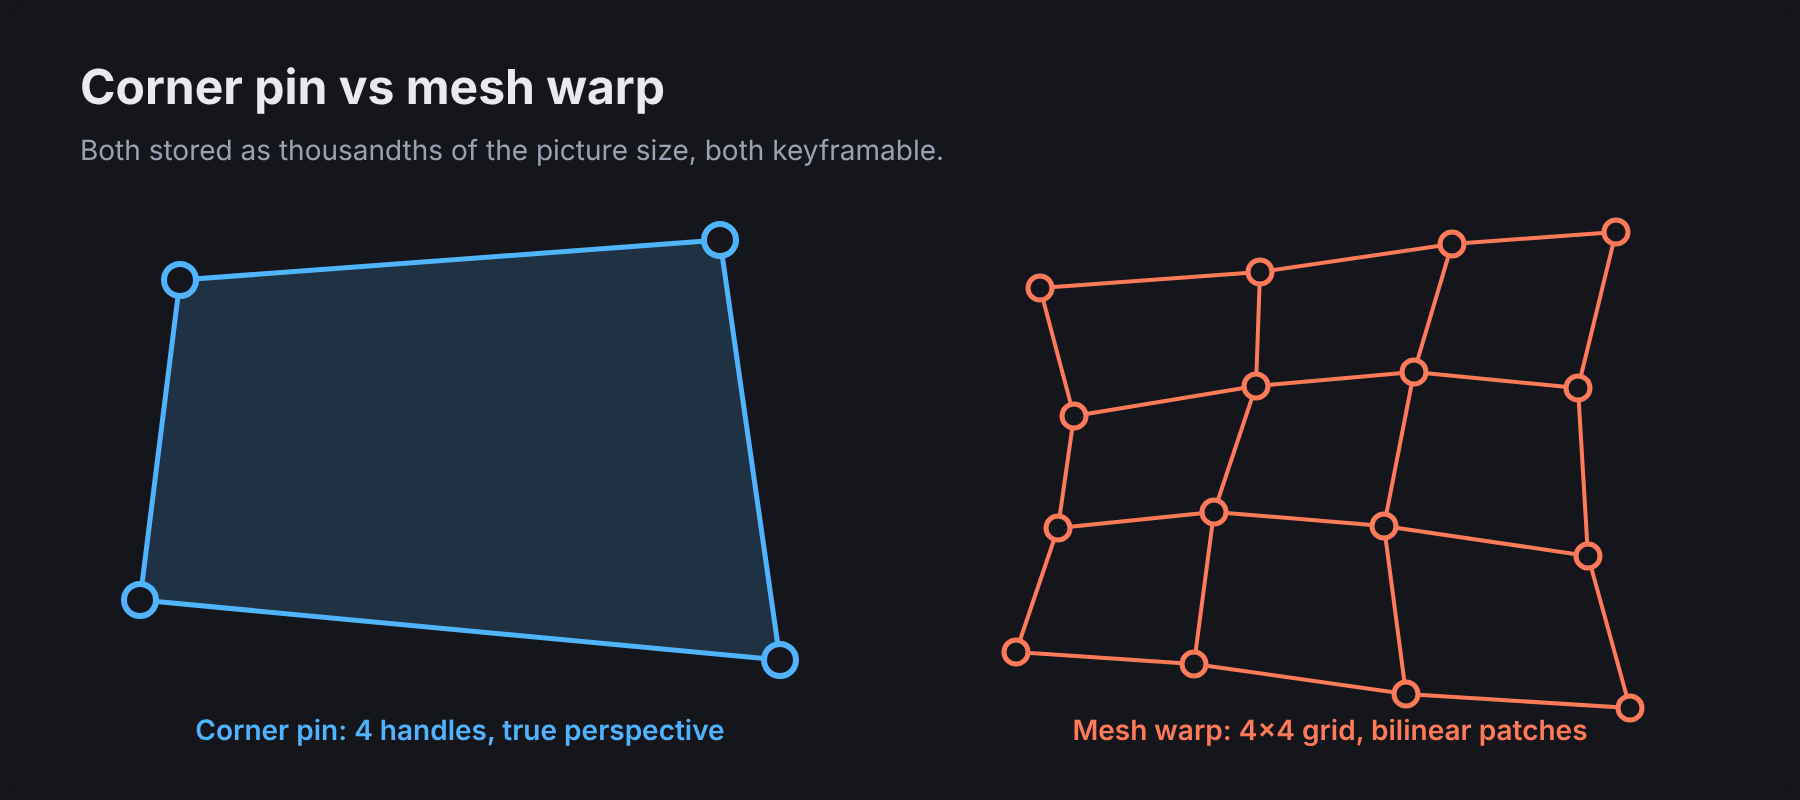
- Corner pin: four handles, with true perspective. Good for slapping a clip onto a screen or a sign.
- Mesh warp: a 4x4 grid of points, drawn as bilinear patches. Good for the wobbly, bendy stuff.
The points are stored as thousandths of the picture size, same as everything else, so they survive resizing the project. If you fold a corner pin over itself so it can’t be solved, the clip is just drawn flat instead of turning into garbage.
There’s a little trick I stole from Photoshop too. Click (don’t drag) on a corner of the transform box and it cycles Transform → Corner pin → Mesh warp → Transform. The current mode is labelled right on the preview.
The Morph section
Skew, perspective and bending got their own section in the inspector, called Morph, separate from Position & Size. Each group gets its own reset button, there’s a reset-all, and everything in it is keyframable.
The bend is keyed as one element. All 40 values (4 corners plus 16 mesh points, x and y) live on one diamond, so you’re not juggling 40 keyframe tracks.
The preview’s transform box also follows the real drawn shape now, through bend, flip, skew, perspective, rotation and scale. Before this, the box was a plain rectangle that had nothing to do with what you were looking at.
Playback with a mesh warp was laggy at first. Working out source positions on a 4 px grid and interpolating between them roughly halved the cost (33 ms to about 15 ms at 960x540 in the sandbox), and clips drawn small get shrunk before bending. One warped clip plays smoothly on the ThinkPad now.
A real Settings window
Ctrl+, or Settings > Settings… and you get a proper window with sections down the left: General, Draft, Edit, Playback, Performance, Export, Captions, Libraries, Advanced.
Changes are staged. Nothing applies until Save, and Cancel or Esc throws them away.
Things that moved in from all over the app:
- Appearance (Follow system / Dark / Light)
- Projects folder
- Autosave on/off, and any interval from 1 to 120 minutes
- Add dropped files to the timeline, use proxies
- Compositor acceleration (same stored value as the Export window’s Acceleration row)
- Export folder, restore defaults
Rows for features that don’t exist yet are still shown, just greyed out with the phase that brings them, like “Not available yet - Phase 9”. I’d rather see what’s coming than have settings appear out of nowhere later.
Project settings
Info tab → Project settings:
- Details: name, project path (Move… relocates the whole folder), copy imported media into the project or keep it where it is (with an option to copy and relink what’s already there), resolution, frame rate, colour space
- Performance: where the proxy files and render cache live
Colour space is just stored for now. Actually rendering with it is Phase 9.
Oh, and pressing Export while a range is picked now opens the Export window with that range already filled in. Small thing, but I kept hitting it.